The Best And Easy WordPress Plugins
These are the plugins that I recommend to use the websites to run smoothly.
List of the plugins:
- Rank Math SEO
- Duplicate Page
- Duplicate Page
- ManageWP
- Antispam Bee
- iThemes security
- Elementor Custom Skin
- Custom Post Type UI
- Google Analytics Dashboard for WP
- reSmush.it Image Optimizer
Rank Math SEO
This is Rank Math SEO most people know Yoast SEO.
Yoast SEO is the No. 1 SEO plugin in the world.
SEO means Search Engine Optimization.
You can optimize your website for google with this plugin.
Google doesn’t know how to read your website so with the use of this plugin you can tell google this is your website structure and then google is like all right and then they will put you on No. 1.
It’s not easy but that’s the idea so Rank Math SEO offers much more for free than Yoast SEO.
Example:
You have to go to your pages and then go to the About page.
You can see the preview, set up the title for this page on google.
You can click on this Title and change it like a portfolio website.
You can also change the description and even the link.
You can add more keywords than one. So Focus Keyword is the main keyword where you want this page to rank.
This plugin also gives you some tips on how to improve your page even more.
You can see Focus Keyword is not in the SEO title so it’s not in the main title of the about page.
It’s very hard to get to a hundred score but maybe only possible when you have a blog and really content heavy website.
For simple business websites just put in a few focus keywords so maybe improve and then you’re done.
Rank Math SEO integrates with Elementor, this is a new feature.
The settings of Rank Math SEO are embedded inside of the Elementor editor.
![]()
Elementor Editor -> New Feature Of Rank Math SEO
You can just stay on the page, make a few edits in the elementor, click on save and then that page is also optimized for Google.
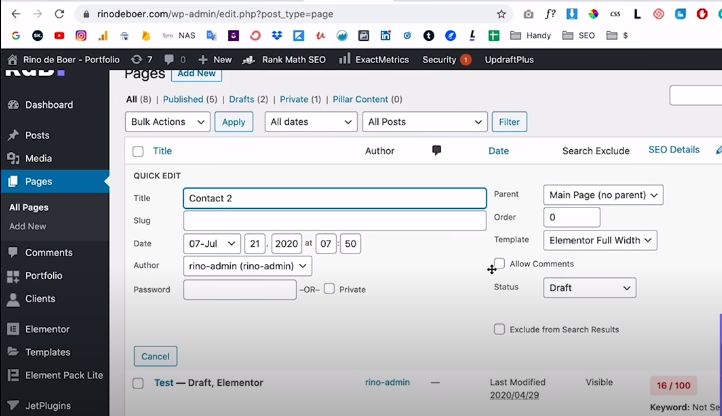
Duplicate Page
It’s a very simple but essential plugin and it’s called Duplicate Page.
This is a simple plugin and you can duplicate post pages and custom posts.
Example:
You can see one is an extra button which is called Duplicate this.
You click on Duplicate this then this whole page will be duplicated.
You want to duplicate the contact page then click on Duplicate this.

Duplicate Page Plugin ->Duplicate this Use For Duplicate Page
You can see the new version and it’s a draft version.

Duplicate Page Plugin ->Duplicate Page Plugin -> Quick Edit Use For Edit Name
You can change that to contact to contact-2 or other.
You open this with Elementor.
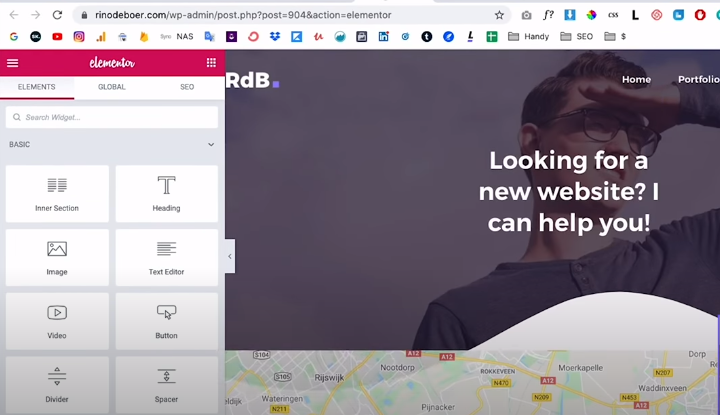
Duplicate Page Plugin -> Elementor View
It has the exact same content as the contact page that you duplicated.
You don’t have to copy all the sections from the other pages.
You could just have your old page and then make the changes to this new page.
It also works with blog and custom post types so a super easy and useful plugin.
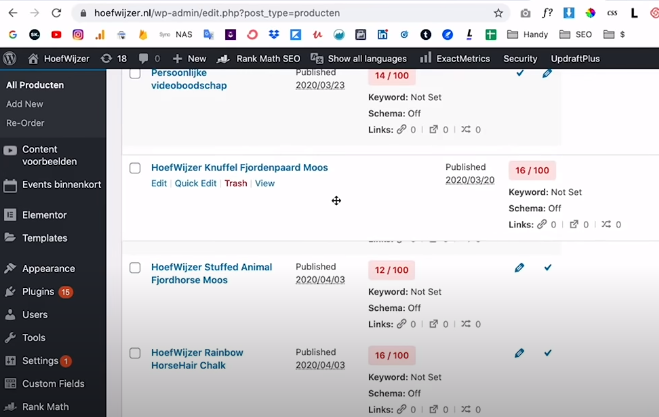
Post Types Order
This is called post types order.
A very simple and very useful plugin.
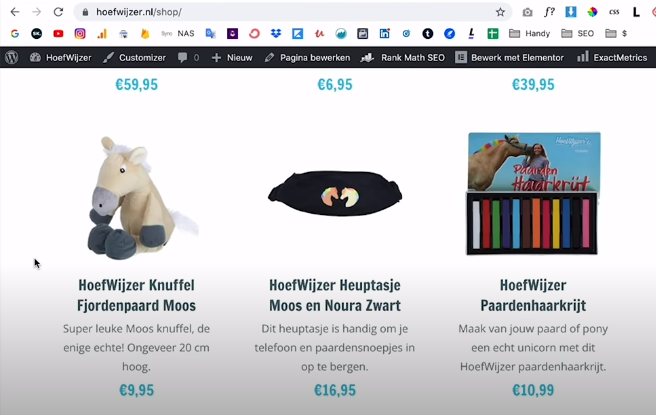
Example:
If you have a web shop with a lot of products so you can use it.
This is not a real web shop, this is how it looks is the web shop.
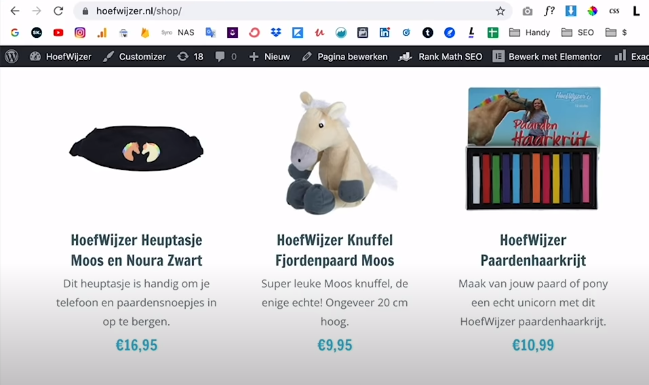
Post Type Order Plugin -> Unswiched Images
If you want to change the order from HoefWijzer Heuptasje to HoefWijzer Knuffel.
You have to go into the wordpress editor.
You have to open every single one of them and change the time to change the order.
That’s a lot of work, not a very nice experience.
This plugin you will get the ability to just change the order by clicking and dragging.
You want HoefWijzer Heuptasje and HoefWijzer Knuffel to be switched so you have to go wordpress editor and find.
You can grab this and make it on top and you can see that they are switched.

Post Type Order Plugin -> Swiched Images
You can also do this with blog posts because on some website.
You have a lot of blog posts and you want to change the order.
This is how you do it.
This example we switched to positions because this website is multi-language so we switched it to positions.
If you just have a website with one language you just move it to one place and then you’re done.
ManageWP
This is a ManageWP worker.
You can manage all of your clients websites with ease.
This is the platform that you use to manage all of your clients websites.

It’s very easy and you can update the plugins.
You can send reports to your clients.
You can login without having to search for the login details.
You can make backups from this system.
Antispam Bee
This is called Antispam Bee.
It’s a very simple and powerful plugin that keeps most of the spam not all because spam is just a very hard thing to do perfectly.
This plugin keeps most of the spam out so if you have a contact form on your website or you have a few email addresses that are placed on your website.
Example:
This plugin will keep most of the spam out because contact forms are a great way.
You don’t want your website to get into your website so you want to protect your website from that so Antispam Bee is a great plugin for that.
It’s also very light and it keeps your website fast faster than the other ones.
A million installs and five stars.
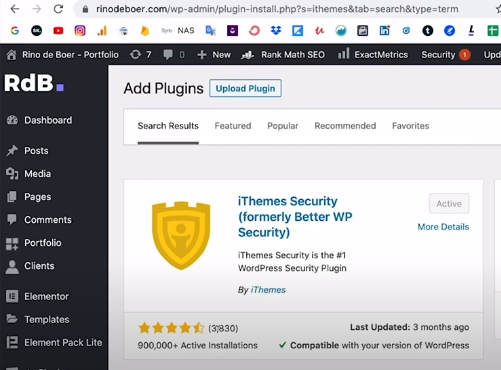
iThemes security
This plugin has to do with security and that is your main security plugin for wordpress.
If you used Word Fence because that is the most used security plugin on wordpress.
It’s really good but it makes your website a little bit slower.
If you want to keep everything smooth and fast so that’s why you can use this plugin.
You can see almost a million installs and four and a half stars so that is very good.
iThemes Security Plugin -> Overview
It’s very easy to install.
You get a few settings.
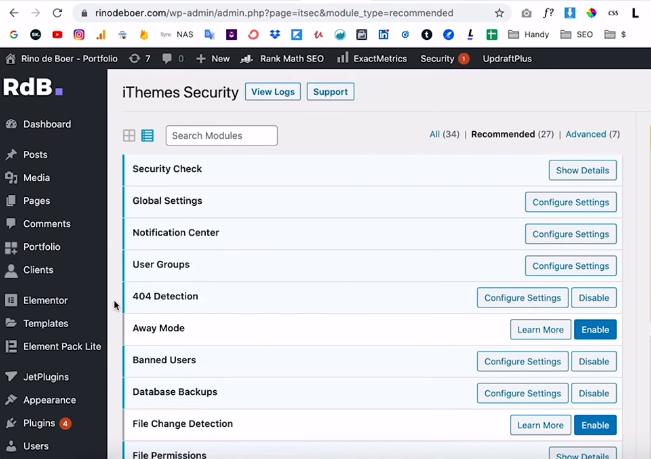
iThemes Security Plugin -> Few Settings
They will send you a lot of emails if you don’t turn them off.
If you have installed items you go to the notification center and turnoff Security Digest and Site Lockouts both.
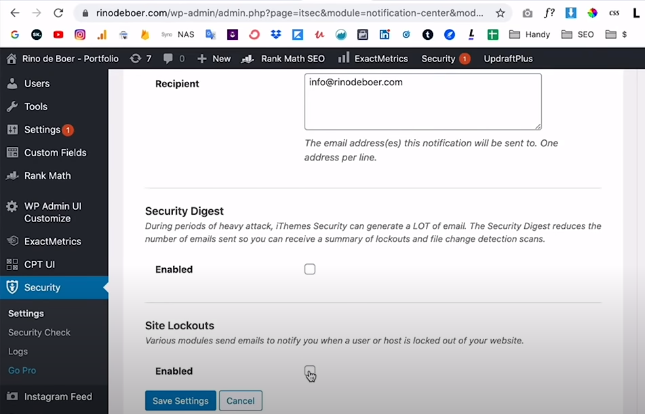
iThemes Security Plugin -> Notification Center Settings
Otherwise you will get a lot of emails because sometimes it happens that in one night 10 people try to break into your website hackers or some or bots.
Then will send you 10 emails and that’s not what you want.
This plugin does the work for you.
Keeps the people away that you don’t want on your website and that’s all you need so you would turn these off.
If you install this plugin you need to check on secure the site and then you can put this otherwise you will get more emails.
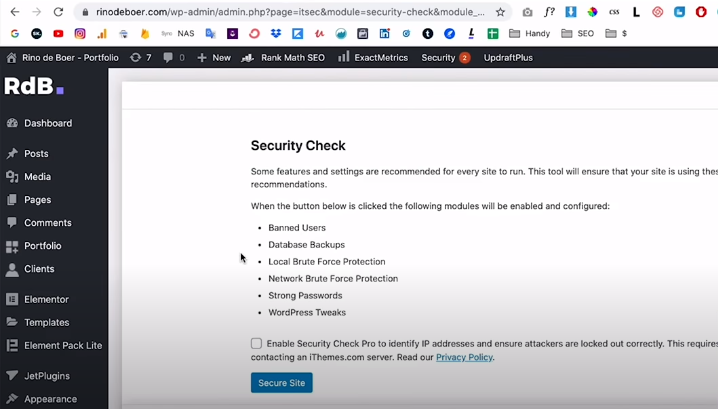
iThemes Security Plugin -> Security Check 1 -> Secure Your Site
You activate the network brute force protection because that means that your website will join a whole network that can detect security issues faster a little bit safer.
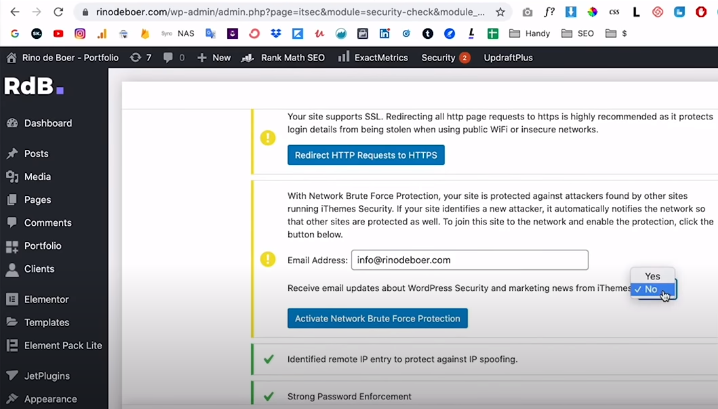
iThemes Security Plugin -> Security Check 2 -> Activate Network Brute Force Protection
I always activate this and I also want to redirect to https.
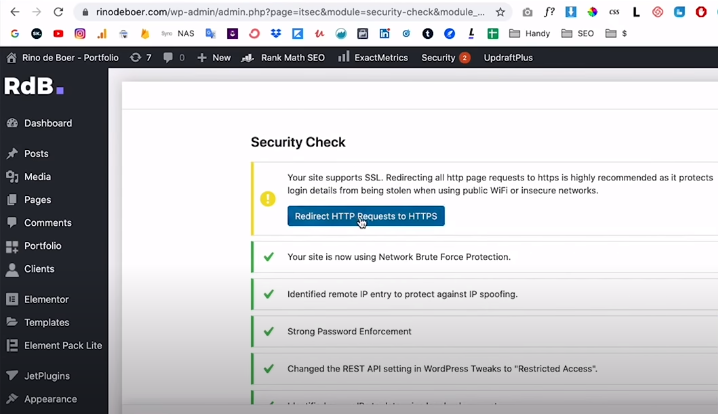
iThemes Security Plugin -> Security Check 3 -> Redirect HTTP Request to HTTPS
Don’t click on the Run Secure Site Again button because it will run again only click on close and then you’re done installing.
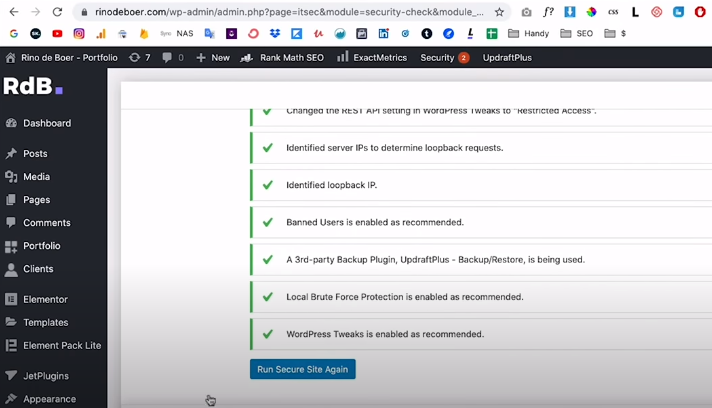
iThemes Security Plugin -> Security Check 4 -> Do Not Click On Run Secure Site Again
Elementor Custom Skin
This is Elementor Custom Skin.
You already have a little bit of experience with Elementor pro.
Elementor Custom Skin is the next step to make your website a little bit more custom.
Example:
This is a website and we have a custom page.
A lot of magazines that you want to show.
Elementor pro itself you can only display the default post widget which is very limited and you want something custom.
This is a custom design and it’s just an image of magazines, a title and actually one word of text.
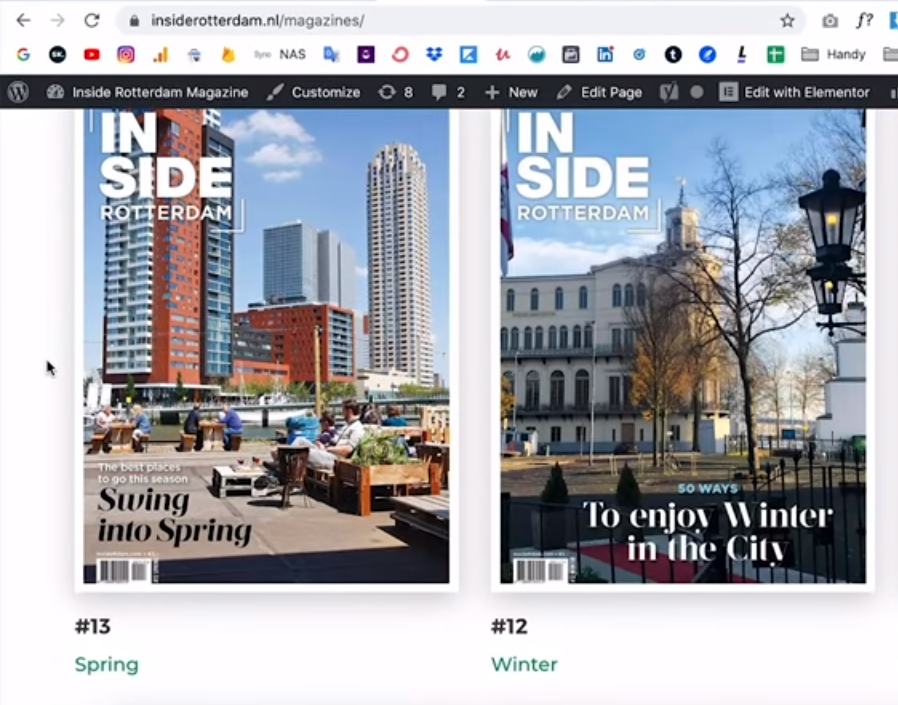
Elementor Custom Skin Plugin -> Website Overview
It’s hard to create a custom design.
This hooefwijzer site is not built with woocommerce this is a custom design.
Custom Design
Create one of these blocks and you can do it with elementor custom skin.
You can just use the elementor pro post widget to display custom dynamic content.
You want to display custom lists which is something that you will run into when you will work with clients in the website become a little bit more custom then elementor custom skin is the way.
You create one of these blocks and then you use the elementor pro both widget to display a grid with a custom post and call this one of these blocks they call this a loop.
A block in a Magazine site they call this a loop so you create one loop and then you can display a custom list.
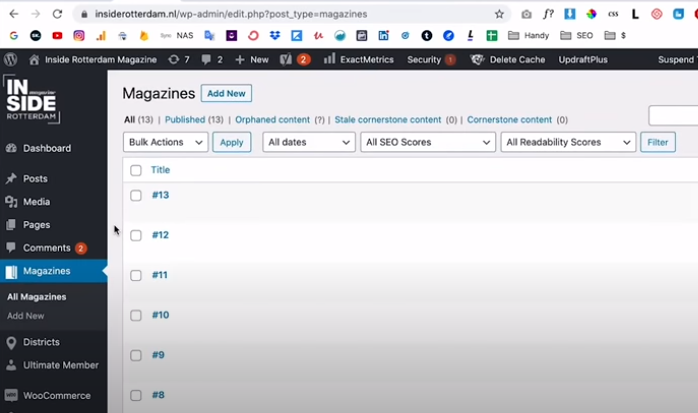
Custom Post Type UI
This plugin is also one you need if you want to have those customs lists.
You can see the magazines tab and districts tab that is not default by wordpress.
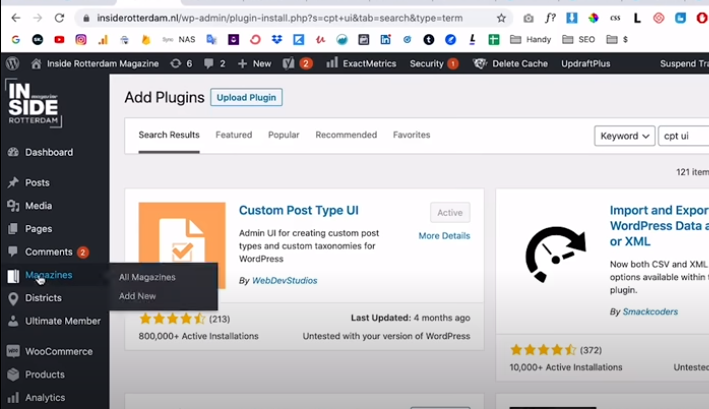
Custom Post Type UI Plugin -> Added New Tabs
You can create a custom post type and it’s just a custom way to display blog posts.
You can create one of the blocks with this plugin called Custom Post Type UI.
By default you can only display dynamic content with posts because wordpress is a blog platform.
These things are actually blog posts so they’re called custom post types.

Custom Post Type UI Plugin -> Display In a Grid
It’s a different custom type of a blog post.
You display that in a grid so to create something like this you will need custom post type ui.
You can have your own list for example of magazines or districts or whatever you want and also your client can add a new magazine if he/she wants to super easy.
Custom Post Type UI Plugin -> Add, Update, Delete Custom List
Google Analytics Dashboard for WP
This is called Google Analytics Dashboard for WP by exact matrix.
People liked the old version better but it’s still pretty decent.
You have this installed and you have Google analytics.
You will get a small preview of your google analytics on your dashboard which you can drag up because sometimes it’s down.
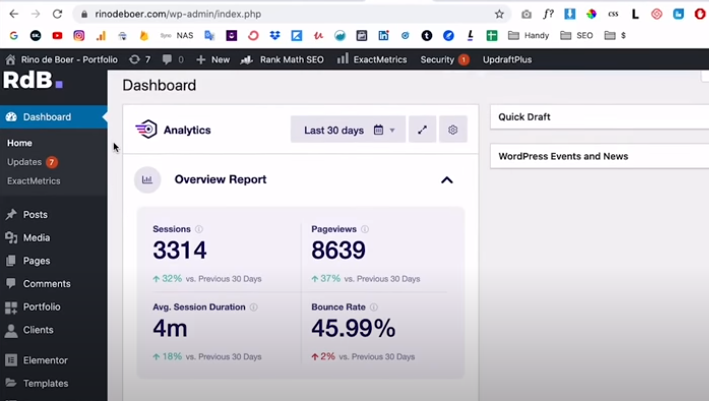
Google Analytic Dashboard For WP -> Overview
You can drag that up just by clicking and dragging.
It’s just a little preview of analytics so as you can see yesterday 164 people on this website.
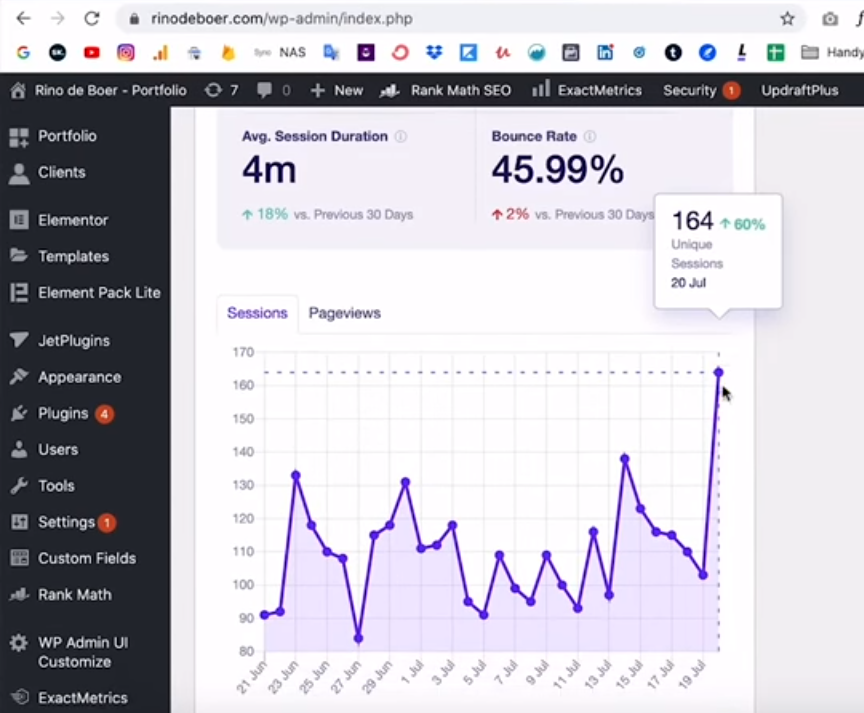
Google Analytic Dashboard For WP -> Preview Of Analytics
It’s a session so that is not people.
You can see the Pageviews.
You want to get more data from google analytics you just go to analytics.google.com.
reSmush.it Image Optimizer
This is called reSmush.it Image Optimizer.
This is the whole name and it’s a very complicated name.

reSmush.it Image Optimizer -> Overview
You just type reSmush.it and you can find it.
Image optimizer is essentially so every time you upload a new image.
It will automatically be compressed which is what you want because a lot of times your images can be more optimized which means a faster website.
Statistics already saved 26 megabytes of space with this plugin.
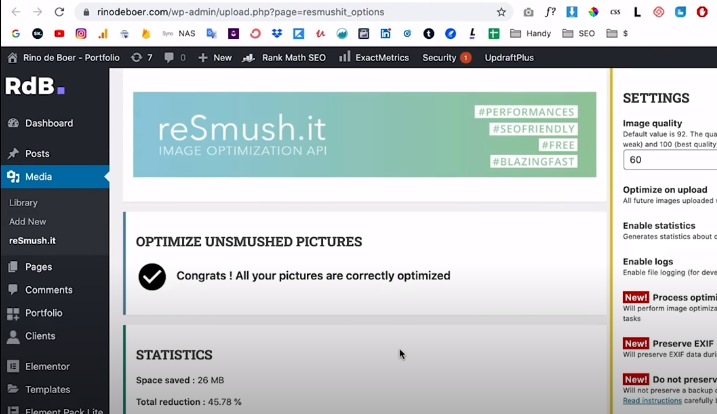
reSmush.it Image Optimizer -> Statactics Of Image Optimizer
You can set Image quality up by default and it’s at 90.
You put this one at 60 because if you want more compression because you want your website to be fast.
If your website is very visually heavy and that means your website is a little bit slower so you want to keep it as fast as possible.
You can put it from 90 to 60.
You don’t want to put it too low otherwise the quality of your images will go down.
The images will stay fast and also don’t upload images that are too big.
You have to upload images that are at maximum 2000 pixels wide because most screens are around that size, maybe 3000 max.
You don’t upload the photos straight from your camera or from your iphone.
Post a Comment

Comment (1)
Elbert
says June 05, 2022 at 10:58 amVery rapidly this site will be famous amid all blogging people, due to info it (t.co)’s pleasant posts